Start with a small design
Foam printing is a low-cost way to explore pattern making without cutting a design out of a block. Instead, you press lines into a flat piece of foam. Ink catches on the surface that remains raised, while the sunken lines tend to stay lighter. One small printing block can become a whole page of stripes, scattered shapes, or tidy rows.
For a first project, gather a smooth sheet of thin craft foam, a blunt pencil, scissors, scrap cardboard, paper, a brayer or small foam roller, and water-based block-printing ink. You will also need a washable surface for rolling out the ink. A clean, flat foam food tray can work for a trial, although it may be more brittle than craft foam. Protect the table and keep a damp cloth nearby for cleanup.
Make a block without carving
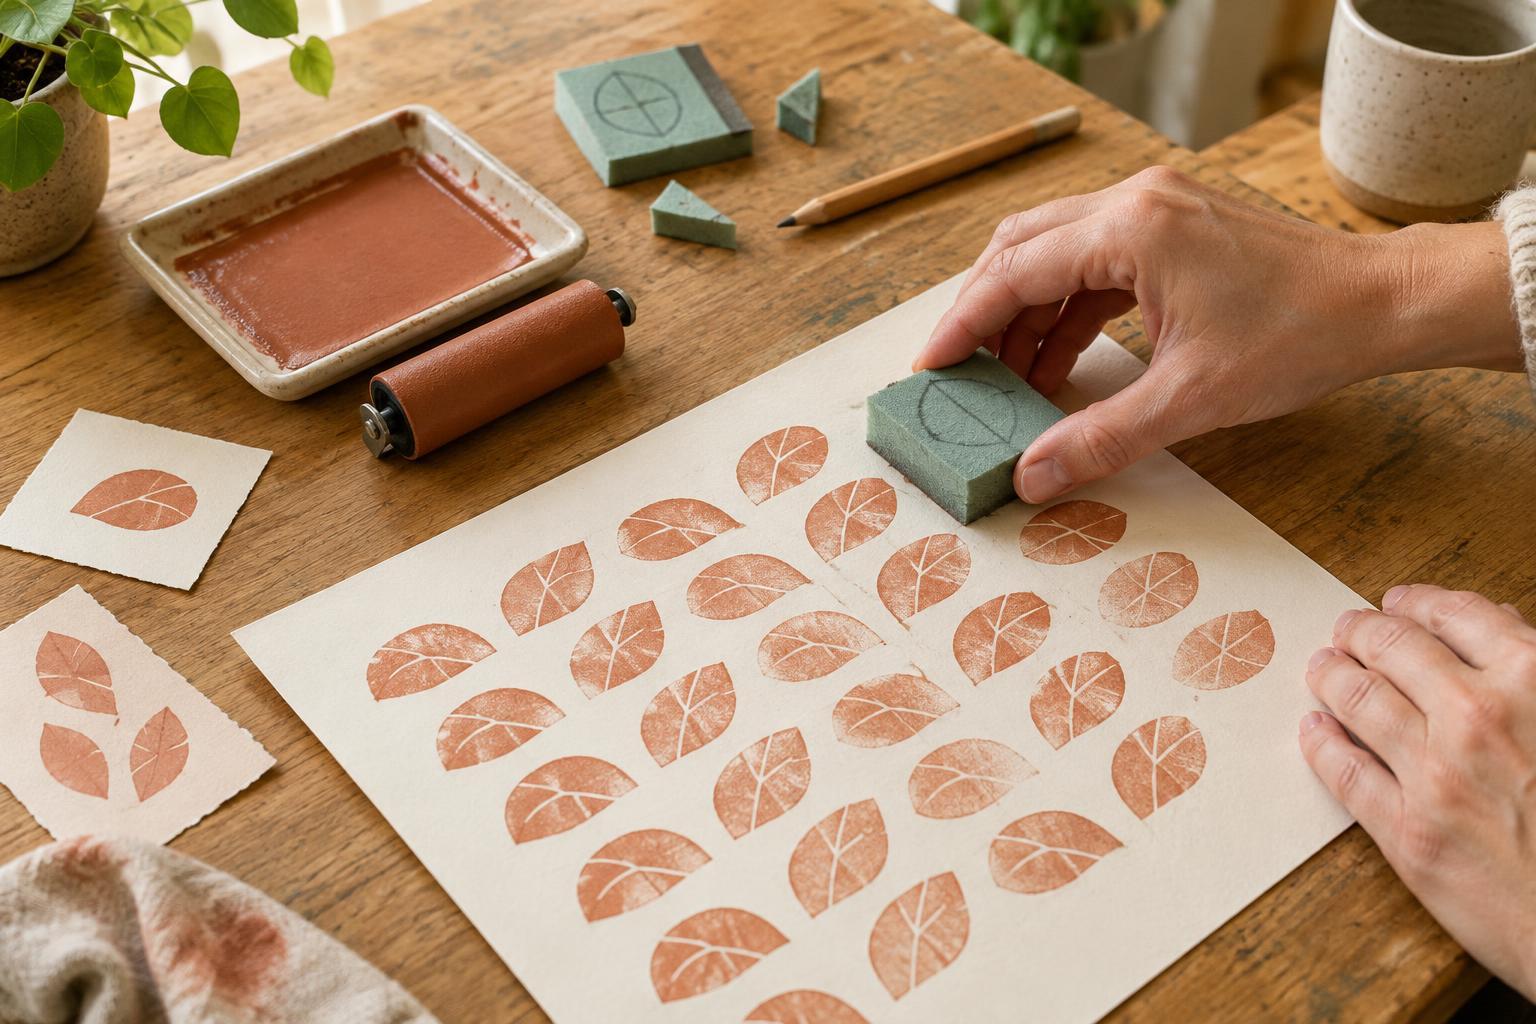
Cut a piece of foam into a simple shape about the size of a playing card or smaller. Circles, leaves, arches, and wavy-edged rectangles are forgiving choices. Draw your design directly on the foam with a blunt pencil, pressing firmly enough to leave a groove but not so hard that you tear through it. Broad lines and open spaces are easier to print clearly than tiny details.
Try a leaf with one central vein and a few diagonal lines, or an arch filled with three wide stripes. Remember that the print will appear reversed, so avoid words for now. Once the lines are pressed in, attach the back of the foam to a slightly larger piece of stiff cardboard with double-sided tape. The cardboard gives you something to hold and helps you press the block evenly.
Test the ink and pressure
Put a small amount of ink on your washable surface and roll it into a thin, even layer. Pass the roller lightly over the foam’s raised face. If ink pools in the grooves, you may be using too much or pressing the roller too hard. Make a first print on scrap paper: lower the block straight down, press across its cardboard backing with your fingers, then lift it straight up.
Look at the test before changing the design. Patchy areas may need a little more ink or steadier pressure; blurred lines often mean there is too much ink. A handmade print need not be perfectly uniform, but testing helps you decide which variations you like. Re-ink for each impression, and let wet prints rest where they will not be brushed by a sleeve or another sheet.
Build a repeat pattern
Start with one sheet of plain paper and choose a loose plan. For an orderly pattern, place impressions in rows, leaving roughly the width of a finger between them. Light pencil marks along the paper’s margins can help you keep the rows level; erase them after the ink is dry. For a more relaxed pattern, turn the block a quarter-turn every other print or alternate its direction from row to row.
Leave enough room to grip the backing without touching a fresh impression. Work across the page in a consistent order, then move to the next row. If your block has an uneven edge, embrace the small gaps rather than trying to force every print to meet. Repetition gives the page structure, even when individual impressions vary. Before adding a second color, allow the first to dry fully and test how the colors look together on scrap paper.
Try one change at a time
Once you have made a full sheet, change a single element and print another. Use the same block with more space between impressions, rotate it into a diagonal arrangement, or make a second block that fits into the gaps. Comparing the sheets makes it easier to see how spacing and direction affect a pattern than changing everything at once.
Finished sheets can become gift wrap, notebook covers, or backgrounds for handmade cards. Clean the block and roller according to the ink’s instructions before the ink dries, and store the foam block flat. The appeal of this project is its repeatability: a quick test, a small adjustment, and another row can turn one modest shape into a design that feels entirely your own.