Set up a sampler you will want to keep
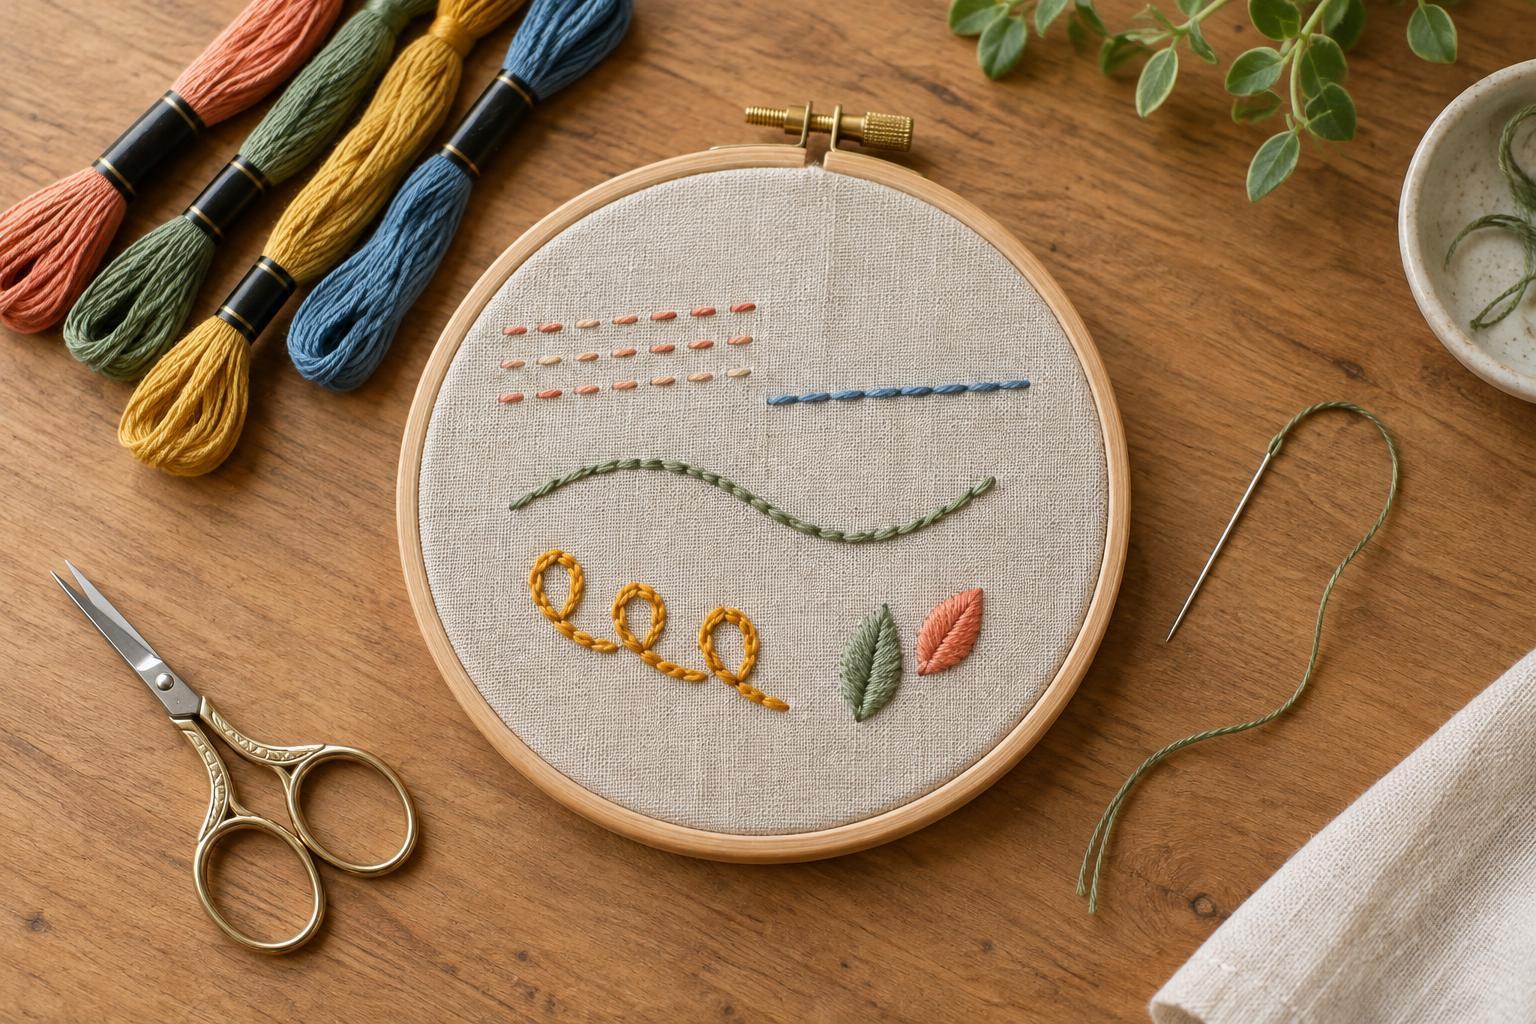
An embroidery sampler is a small piece of fabric where you practice stitches in an intentional arrangement. It is a good first project because each line gives you room to improve, and uneven stitches can become part of the record of learning. This sampler uses five stitches for outlines, curves, decorative borders, and filled shapes.
Gather a square of plain cotton fabric about 8 inches across, a 6-inch embroidery hoop, an embroidery needle, embroidery floss, scissors, and a pencil or washable fabric marker. Light-colored fabric makes your guide lines easier to see. If you use a washable marker, test it on a scrap and follow its removal directions. Keep the needle somewhere safe whenever you pause.
Draw five short horizontal practice areas, leaving space between them. Give the first three a straight line and a gentle curve, the fourth a wavy line, and the fifth two small leaf or oval shapes. These marks are guides, not rules. Place the fabric in the hoop so it is smooth and comfortably taut, then cut a length of floss roughly as long as your forearm. Separate two or three strands from the bundle to start; shorter lengths and fewer strands are usually easier to manage.
Build confidence with running and back stitch
Use the first area for running stitch. Bring the needle up from the back of the fabric, move a short distance along the line, and take it down. Bring it up again after a similar-sized gap. Continue making a dashed line, first on the straight guide and then on the curve. Aim for a comfortable rhythm rather than identical dashes. Running stitch works well for light borders and lines that should look airy.
Back stitch makes a more continuous line. Bring the needle up a short distance from the start of your guide, then take it down at the start. Bring it up an equal distance farther along the line and take it down in the hole where the previous stitch began. Repeat, always stitching back toward the end of the last stitch. Try it in the second area, including the curve. This stitch is useful when you want a clear outline or readable embroidered letters.
To secure either line, leave a short tail on the back when you begin and catch it beneath your first few stitches, or make a small knot if that feels simpler. At the end, slide the needle beneath several stitches on the back before trimming the floss. Keep the thread snug, but avoid pulling so hard that the fabric puckers.
Try a soft line and a decorative loop
Split stitch is a helpful choice for smooth-looking curves. Start with one ordinary stitch along the third guide. Bring the needle up through the middle of that stitch, separating its strands, then take it down a short distance ahead. Come up through the middle of this new stitch and continue. The overlapping stitches form a textured line. Move in small steps around curves; a line is easier to steer when each stitch covers only a little ground.
Use the fourth area for chain stitch. Bring the needle up on the guide, then insert it down close to that same spot. Before pulling it through, bring the needle tip up a short distance ahead on the line. Lay the working thread beneath the tip and pull the needle through gently to form a loop. Start the next loop by inserting the needle near the end of the one you just made. When the chain is long enough, hold its last loop in place with a tiny stitch over the loop’s far end.
Chain stitch can make a bold border with relatively little stitching. If your loops vary in size, use the next few to experiment: shorter spaces create a compact chain, while longer spaces make it more open. Neither needs to be perfect to look deliberate.
Fill two small shapes with satin stitch
Satin stitch fills an area with closely placed, parallel stitches. Choose one of your small shapes and bring the needle up at one edge. Take it down directly across at the opposite edge, then come up beside your starting point for the next stitch. Work across the shape, keeping the stitches close enough that little fabric shows between them. Change the length of each stitch as the shape widens and narrows.
Small shapes are friendlier than large ones: long threads can snag or sit loosely on the surface. If filling an oval feels awkward, try a narrower leaf. You can back stitch around its outline first to give yourself a clear boundary, then cover or follow that outline as you fill. Stitch the second shape in another color or direction to see which effect you prefer.
Finish it and put the stitches to use
When the stitching is done, look at the back for loose thread ends and weave them under nearby stitches. Remove any guide marks according to the marker’s directions, then let the fabric dry fully if you dampened it. You can return the sampler to its hoop for display, or store it flat as a reference for future projects.
Notice which stitch suited each job: running stitch for a light accent, back stitch for a crisp edge, split stitch for a soft curve, chain stitch for a prominent border, and satin stitch for a small patch of color. Your next project could be a simple motif on a fabric bookmark or cloth napkin. Use this sampler to choose a stitch, then let the new project give you another chance to practice it.